Introduction
What is Kasyro?
Kasyro is a modern point-of-sale system designed for restaurants, cafes, bars, retail stores, and other businesses. It is a cross-platform application that runs on computers (macOS, Windows, Linux) and on mobile devices (Android, iOS). You operate it on a touchscreen, tablet, or computer.
The system works on the principle of cloud synchronization — all data is automatically synced between your devices and a central server. If you have multiple registers or mobile devices (for example, a tablet for the patio), you always see the current status of all orders and tabs. If the internet goes down, the system keeps working offline and the data syncs as soon as the connection is restored.
Key features
Order management — Create tabs for individual tables, track orders in real time, and add items gradually as the guest requests them.
Flexible payments — Supports cash, payment cards, bank transfers, meal vouchers, and other payment methods. A tab can easily be split between guests or several tabs merged together.
Product catalog — Manage items with prices, variants (e.g., drink size), and modifiers (sauces, sides, etc.). The system tracks inventory levels.
Visual map — A clear floor plan of the restaurant with individual tables. Occupied tables are highlighted with color, so you can instantly see what is available.
User roles and permissions — Different roles (Administrator, Manager, Server, Helper) with different permissions. Everyone sees and can do only what matches their role.
History and statistics — A complete record of all transactions, plus detailed overviews of sales, shifts, and tips.
System requirements
Kasyro is a cross-platform application:
- Computer — native application for macOS, Windows, and Linux
- Mobile / tablet — native application for Android and iOS
The application automatically adapts to the screen size:
- Full mode (screens ≥ 680 px wide) — the cart and the side panel are always visible side by side. Ideal for tablets, POS terminals, and computers.
- Compact mode (screens < 680 px wide) — the full screen switches between the catalog and the cart, with navigation via the bottom bar. Optimized for mobile phones.
The mode is selected automatically based on screen width, but you can switch it manually in Settings → Appearance → Screen layout (Automatic / Full / Compact). The font and control size can be further adjusted in Settings → Appearance → Control size (Very small to Very large).
The system requires an internet connection for synchronization. During offline operation, you can keep working with local data.
First launch (Onboarding)
When you launch Kasyro for the first time on a new device, a welcome screen appears titled "Kasyro point-of-sale system" with five buttons.
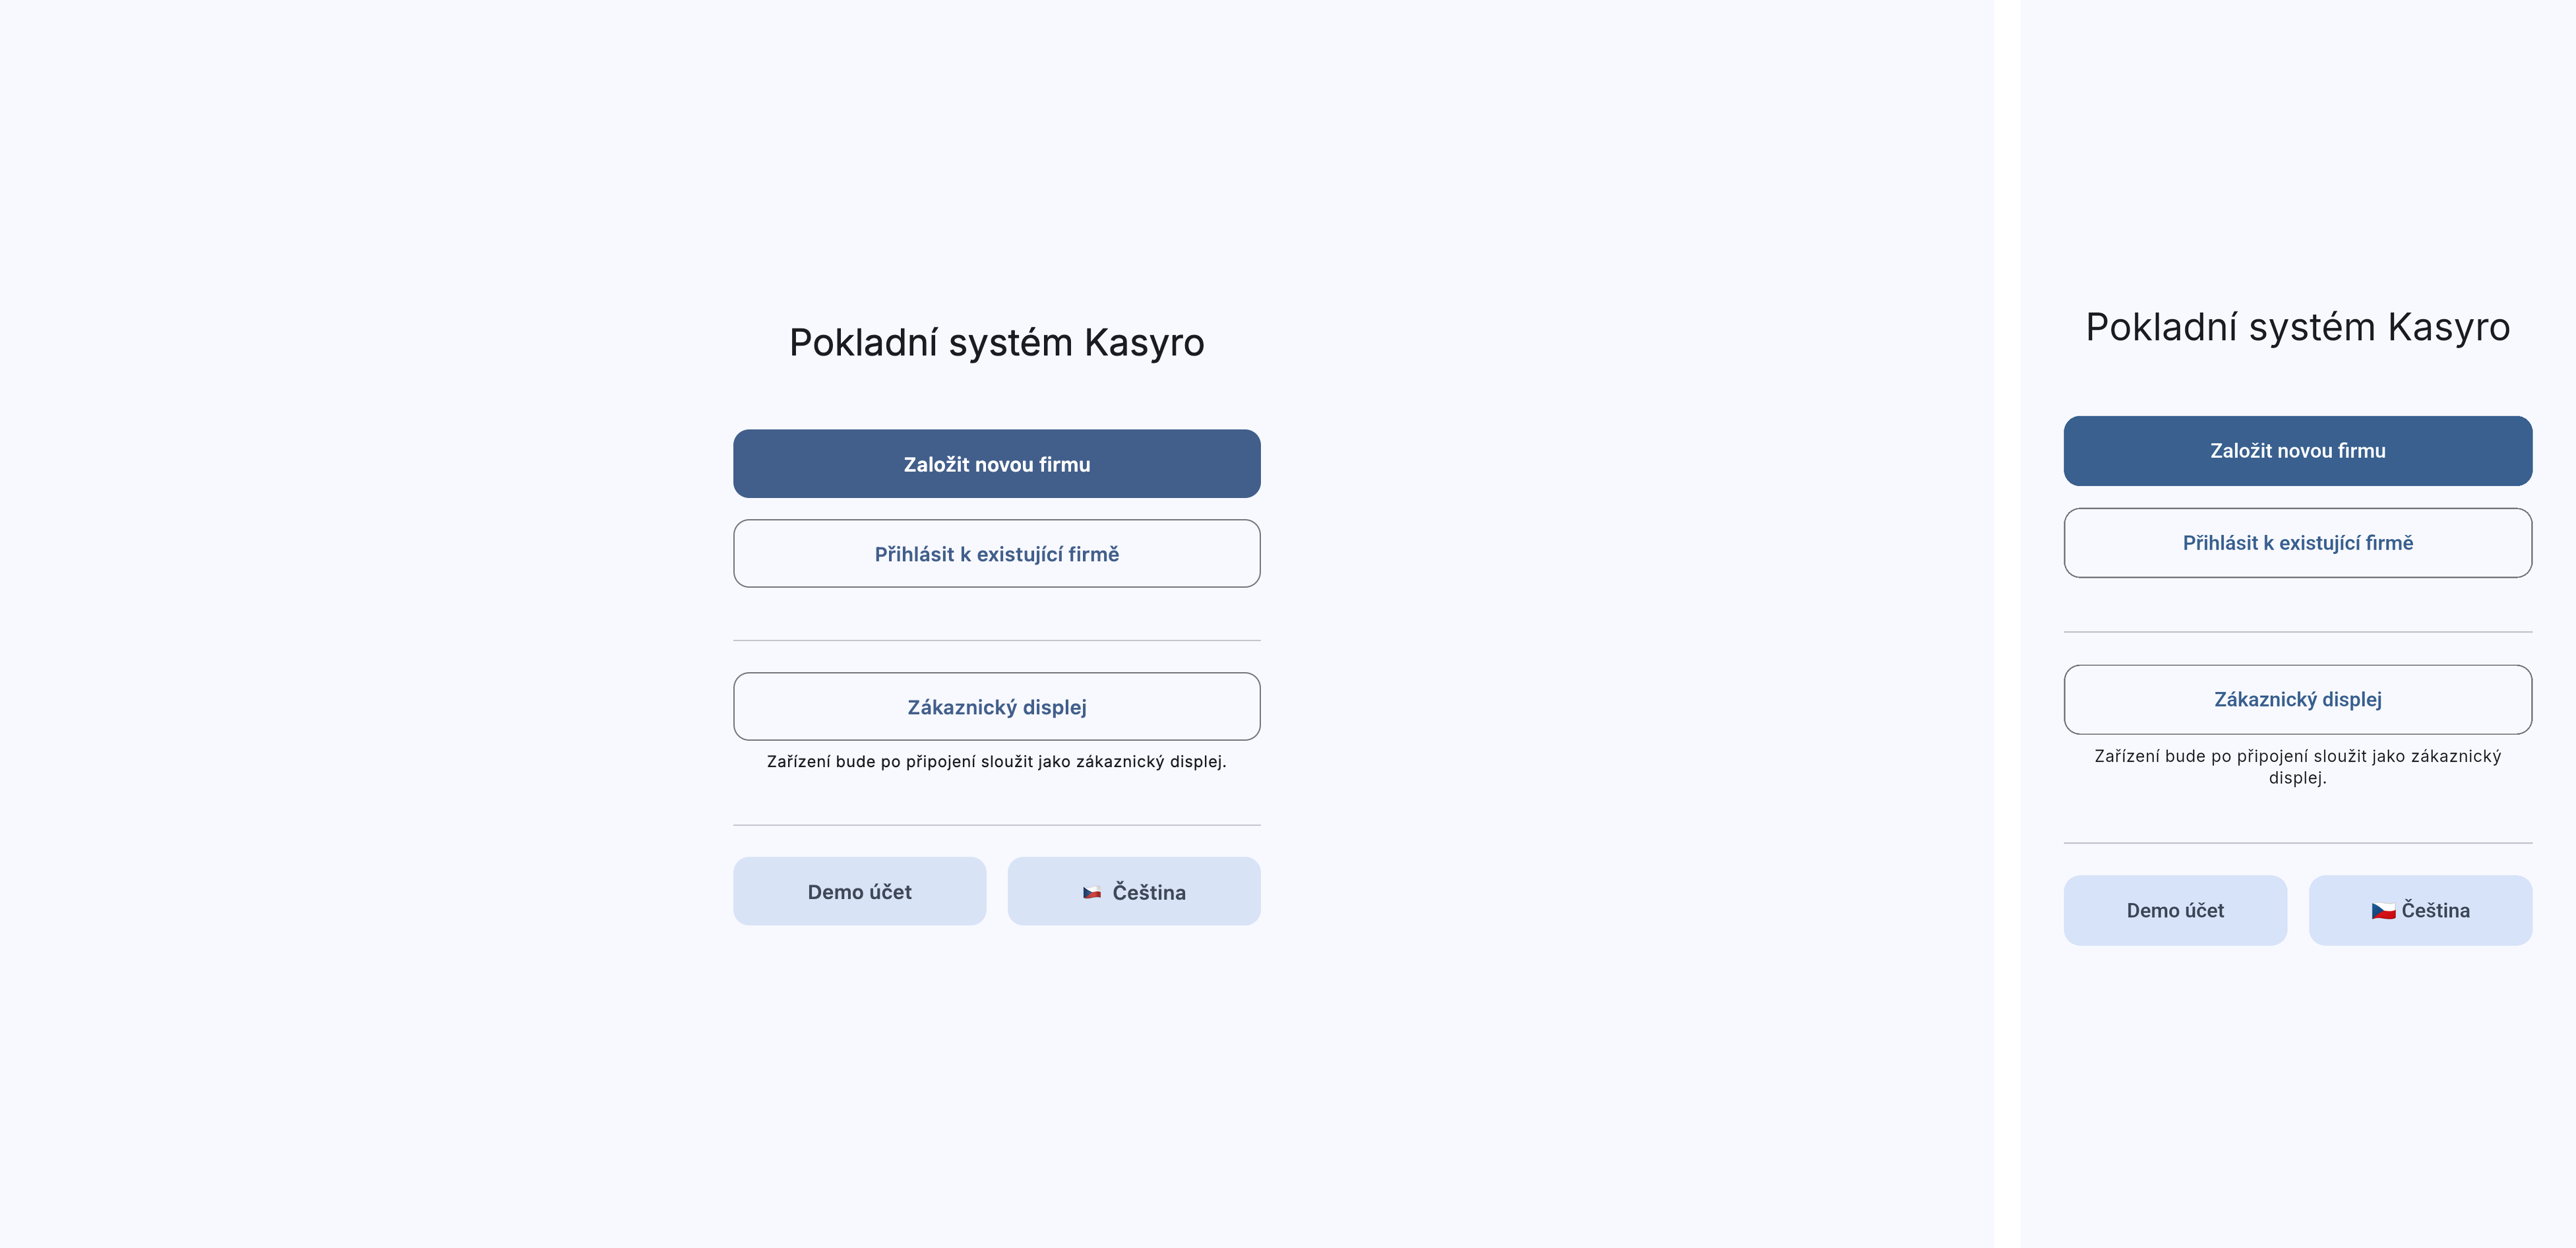
Options on the welcome screen
Create a new business — Starts the wizard for creating a new business. Choose this option if you are a new user and want to set up Kasyro from scratch. The wizard guides you through creating a Kasyro account, entering your business details, and creating the first administrator.
Connect to an existing business — For connecting an additional device (a tablet, a second register) to a business that already exists in Kasyro. You sign in with the administrator email and password and select the register you want to assign the device to.
Customer display — Sets up the device as a customer display that shows the customer information about their order. After you click it, a numpad appears for entering the 6-digit pairing code shown on the main register.
Demo account — Creates a complete sample business with test data, including two weeks of sales history. Ideal for trying out the system without having to enter your own data. The demo business is automatically deleted after 6 hours.
Čeština / English — Interface language selection. The default is Czech. The language affects the entire system interface and can be changed later in the settings.
Creating a new business — the wizard
The business creation wizard has three steps: Kasyro account, business details, and administrator setup.
Step 1: Kasyro account

On the "Kasyro account" screen, fill in:
Email — Your email, which will serve as the login credential for your Kasyro account. It is used to sync data between devices and to manage the business.
Password — The password for your Kasyro account. It must be at least 8 characters long.
Confirm password — Repeat the password to verify it.
Below the form there is a link "Already have an account? Sign in" — if you already have a Kasyro account from before (for example, you previously created another business), click here and sign in with your existing credentials. The form switches to sign-in mode (only the Email and Password fields are shown).
Click Continue (or Sign in in sign-in mode) to proceed to the next step. The Back button returns you to the welcome screen.
Step 2: Business
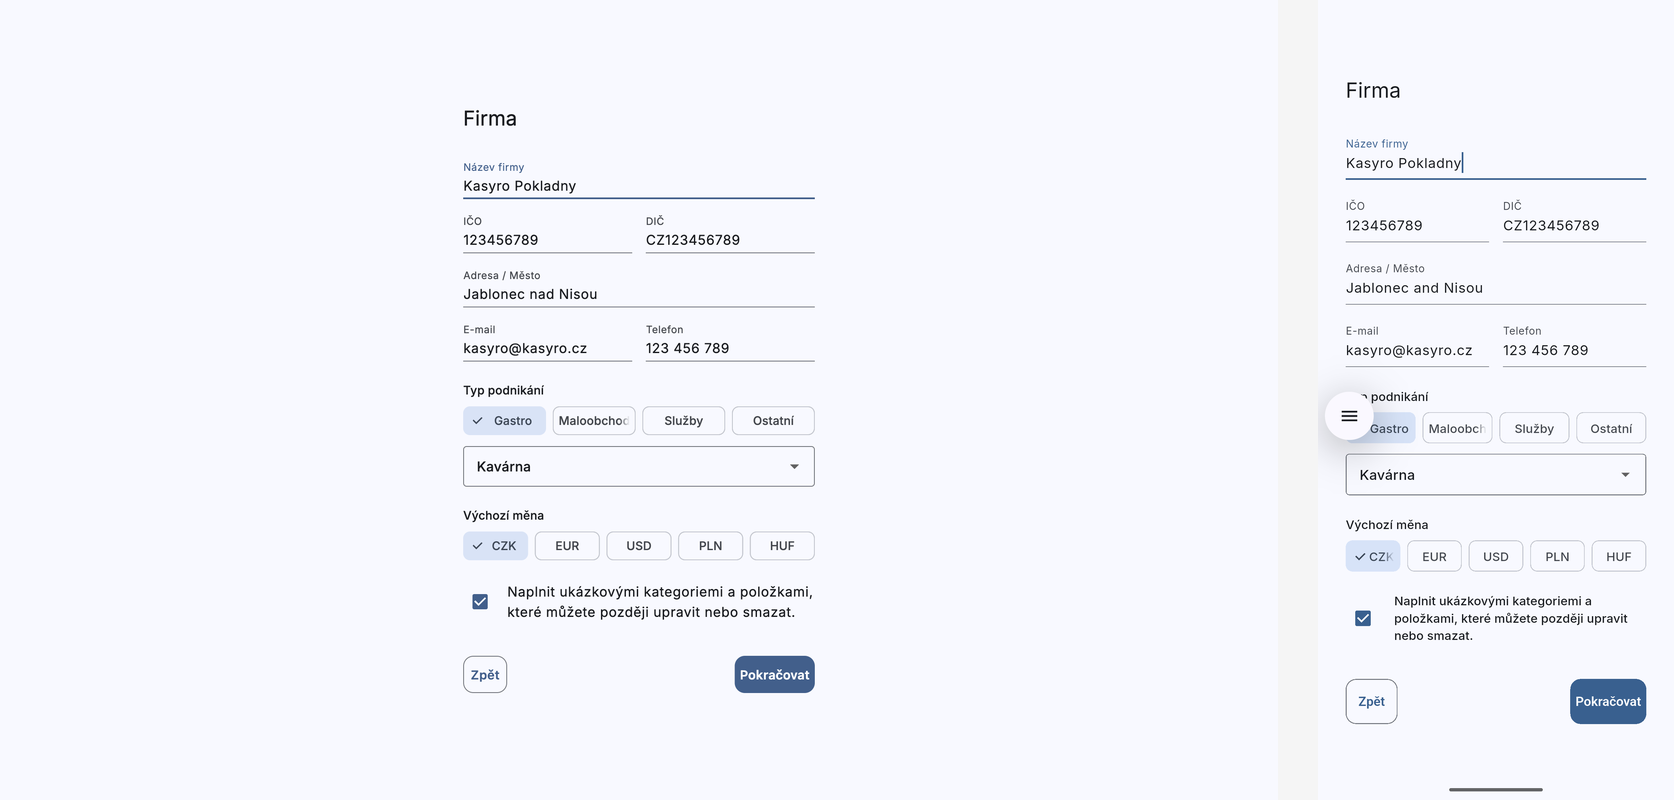
On the "Business" screen, fill in the details of your establishment:
Business name (required) — The name of your business or establishment as it will appear in the system and on receipts.
Business ID and VAT ID — Identification numbers (optional). They will be shown on receipts.
Address / City (required) — The address of the establishment.
Email — The business's contact email (optional, may differ from the login email).
Phone (required) — A contact phone number.
Business type — Choose the category that best matches your business: Food & Drink, Retail, Services, or Other. After you select a category, a dropdown with subtypes appears:
- Food & Drink: Restaurant, Bar, Cafe, Cafeteria, Bistro, Bakery, Food Truck, Hotel
- Retail: Groceries, Clothing, Electronics, General goods, Florist
- Services: Hair salon, Beauty salon, Fitness, Auto repair
- Other: Other
Default currency — Choose the main currency: CZK (Kč), EUR (€), USD ($), PLN (zł), or HUF (Ft). The default is CZK.
Populate with sample categories and items — An optional checkbox (default: unchecked). If you check it, the system creates sample products and categories that you can later edit or delete. The sample data will match the business type you selected.
Click Continue to move on to the final step. The Back button returns you to step 1.
Step 3: Administrator
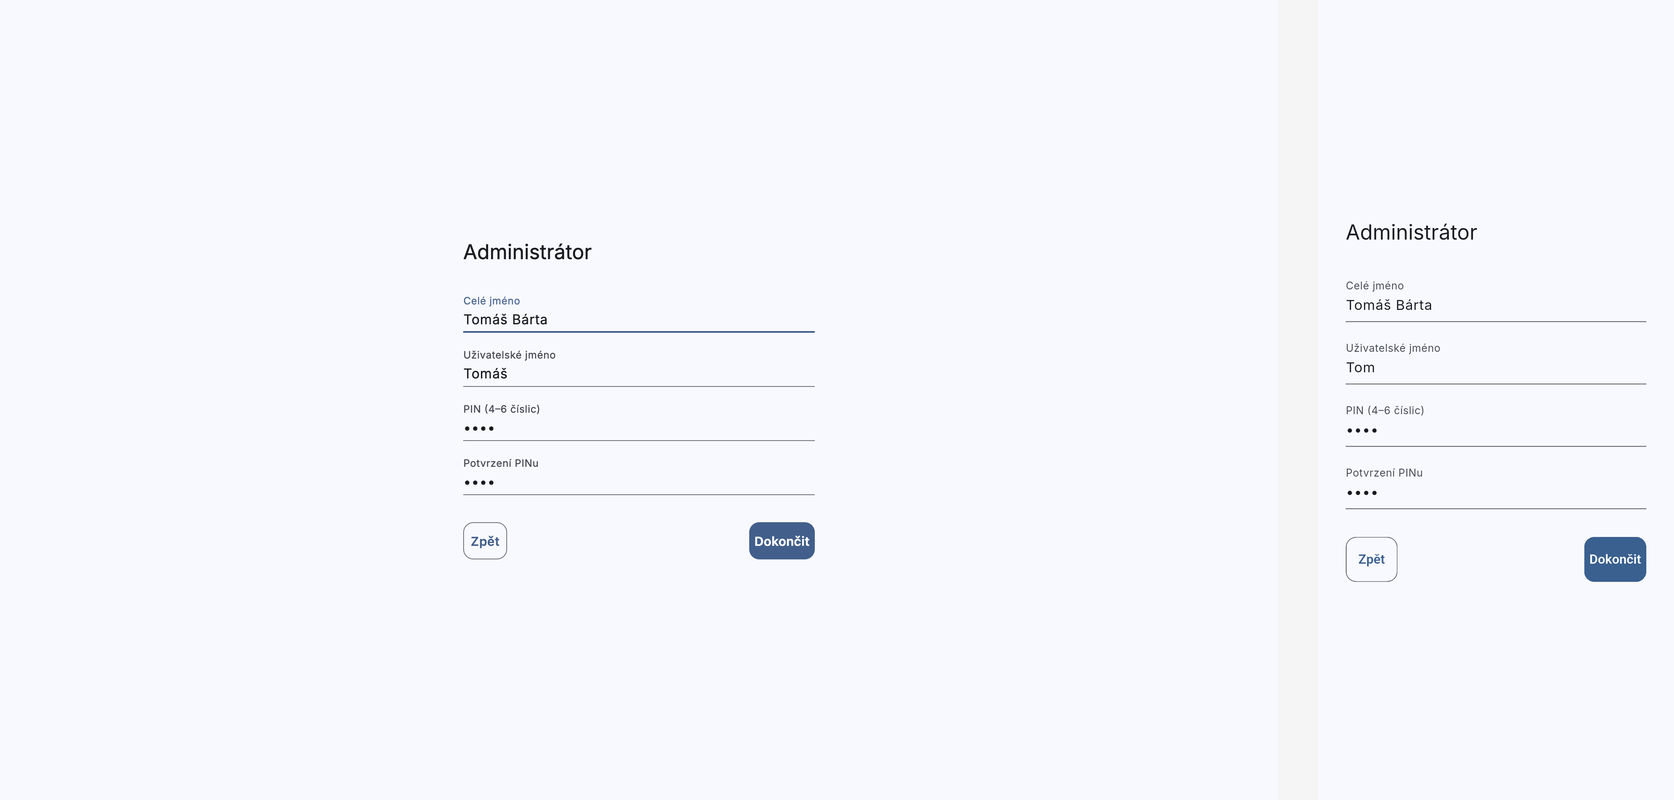
On the "Administrator" screen, create the first user, who will have full permissions:
Full name (required) — Your full name (shown in the system, on receipts, and in shift overviews).
Username (required) — A short identifier for signing in on the selection screen.
PIN (4–6 digits) (required) — A numeric code for quickly signing in to the register. You will enter this PIN every time you sign in — choose a code that is easy to remember but not easy to guess.
Confirm PIN (required) — Repeat the PIN to verify it.
Click Finish to create the business and set up the system. After it completes successfully, you are redirected to the sign-in screen, where you can sign in immediately with your PIN.
Connecting to an existing business
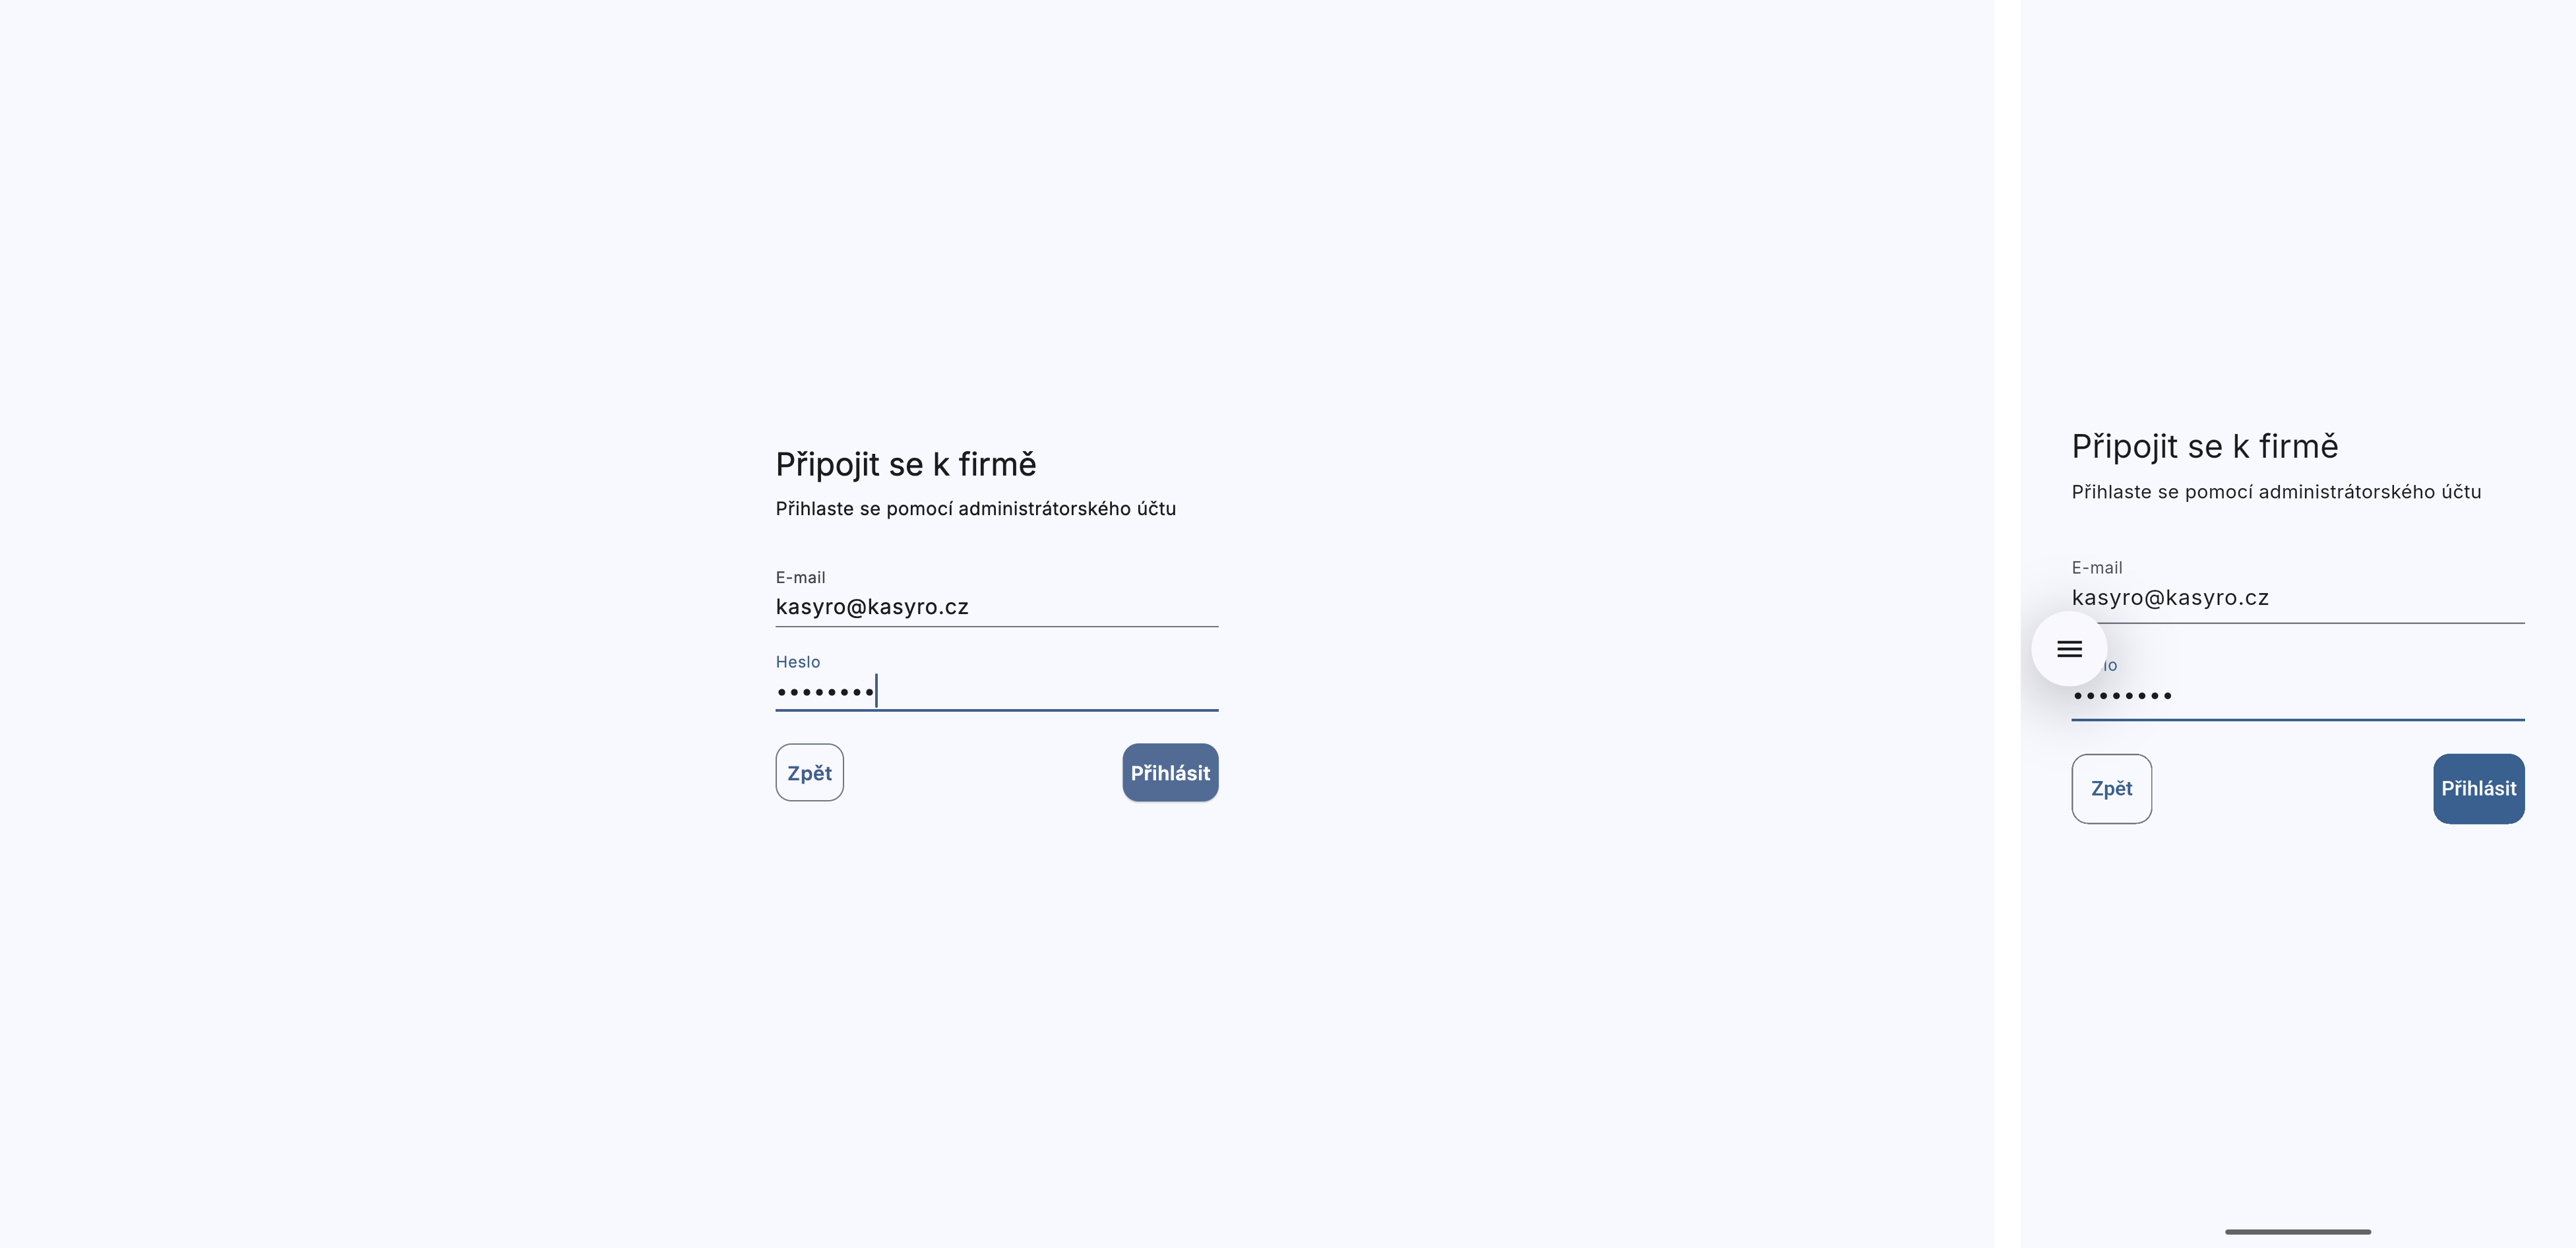
If your business already exists in Kasyro and you want to add another device (a second register, a tablet for servers, etc.), choose "Connect to an existing business" on the welcome screen.
The "Connect to a business" screen appears with the instruction "Sign in with your administrator account". Fill in:
Email — The email of the Kasyro account under which the business was created.
Password — The password for that account.
After you click Sign in, the system looks up the business assigned to that account. If the business is found, its name is shown on a card with a Connect option. After you click it, the business data is downloaded to the device and the register selection appears — a list of available registers. Each register is shown as a card with a type icon (register, mobile, computer), a name, and a register number. Registers assigned to another device are marked with a lock icon — selecting them requires confirming the takeover. Below the list there is a Create new register option for adding a new register.
Customer display
The Customer display option on the welcome screen is used to set up the device as a display for customers. The display shows the customer information about their order — the items being added and the total amount.
After you click it, the "Enter code" screen appears with six empty boxes and a numeric keypad. You can find the pairing code in the settings on the main register (see the Customer display chapter). After you enter the sixth digit, the system automatically looks up the register and sends a pairing request. A confirmation prompt appears on the main register — once approved, the display is linked to the register. If confirmation does not arrive within 60 seconds, the request expires.
Below the numpad there is a ← Back button to return to the welcome screen.
Demo account
The Demo account option creates a complete sample business with pre-filled data that you can try out right away. After you click it, the "Create a demo business" dialog appears with a mode option:
Food & Drink — A restaurant-type demo business with a menu, tables, and drink and food categories.
Retail — A store-type demo business with goods and categories.
The Back button returns you to the welcome screen. After you click Food & Drink or Retail, a business is automatically created with four users in different roles (Administrator, Manager, Server, Helper). The PIN for all users is 1111. The demo includes two weeks of sales history for realistic statistics.
The demo business is automatically deleted after 6 hours. It is intended only for trying out the system, not for live operation.
How to navigate this manual
Each chapter describes one part of the system. You don't have to read it in order — if you need to know how to do something specific, go straight to the relevant chapter:
- Sign-in — PIN sign-in, switching servers, locking
- Main screen — Tab overview, floor map, navigation
- Selling — How to add items, variants, modifiers
- Tabs — Creating, details, moving, merging, voiding
- Payments — Payment methods, splitting a payment, tips
- Reservations — Table reservations, statuses, Gantt chart
- Settings — Business, location, register, peripherals
First steps after setup
Once you finish onboarding and sign in with your PIN (see the Sign-in chapter), you land on the main screen. There you see a list of all open tabs and buttons for the main activities.
We recommend trying out:
- Opening a shift in the cash journal (see Register)
- Creating a new tab
- Adding an item to an order
- Paying a tab